Showing posts with label farm buildings. Show all posts

Saturday, September 3, 2011

Chicks!!!

Towards the end of August we placed a new order for meat chickens (Cornish X).  They were to arrive at the beginning of September.

At the end of August we were very surprised to find one of our Buff Orpingtons had been setting a clutch of eggs under our old horse trailer.  We left her alone and on September 3rd we found the eggs had hatched.  Out of the lot she was sitting on, she hatched out 5 beautiful little fuzzballs.  What luck it was to have our meat chicks arrive the very same day!  We put 10 of those in with her 5 original chicks and moved her and chicks into the chicken hoop house.

What a good mama hen!

Thursday, June 16, 2011

Pig housing revised

After losing some piglets which were possibly squished or otherwise abused by our boar, we decided to give our two sows each their own secure quarters.  The pig shed got split down the middle and we built two pens for them.  Bubbles (the boar) got to free roam in the larger pasture.


Little Miss, down to only one little piglet


Monday, June 6, 2011

Milk Stanchion Complete

Never-ending projects! Our "to do" list is a mile long!

DH and our oldest son started the concrete work in the milk stanchion. We ran out of concrete and had to stop for the night.


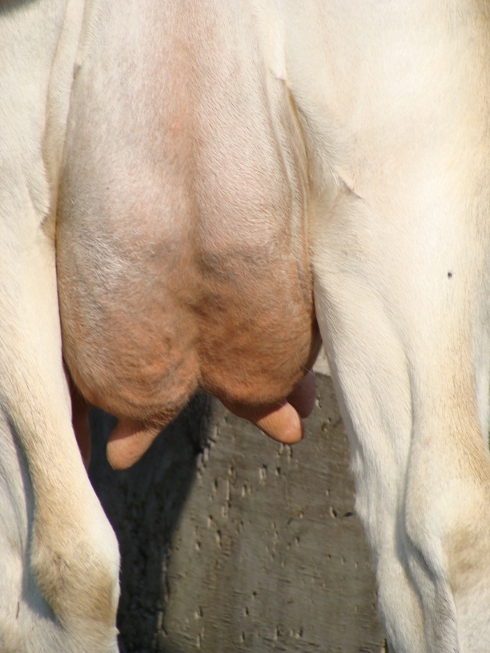
In the meantime, I realized I was off on Butterbelle's due date.  I re-calculated and realized she is due anytime between June 6th and `12th.  She looks uncomfortable and spends a good deal of time just laying down.


Her udder is swollen with milk.  We'll eventually have a calf!

Friday, June 3, 2011

Goat Shed and Pen

Well, to say Poppet did not enjoy being crated every evening would be an understatement!  So we set to work building a shed (Senz style!) and pen so we could have her penned up 24/7 to wean her off Ping and milk her morning and evening.

Building the pen

Of course the goats all had to inspect it

Happy helpers :)

Lilly loves me.  Dearly.  I'm going to miss her when she has to go back to her own goat mama.

The completed shed and pen.
Of course the first night and the next day there was a whole lot of "crying" from little Poppet.  Ping wasn't ecstatic about the whole idea either... but Poppet is over 3 months old and eating hay and grain just fine.

Saturday, May 21, 2011

Dairy Cow Milk Stanchion & Random Photos

That's what we've been busy with this weekend.  Relatively easy, it's not finished yet, we want to concrete the floor.


Ping decided to model it for us:


She's quite photogenic don't you think?  (Seriously, who thought I'd love goats so much!?)


Poor Poppet.  She has to be locked up for the night and doesn't enjoy it.  Working on a pen for her so she can be separated from mom 24/7.


The ducks are getting big.. and beautiful!


We have a nice variety. Three Pekins, two Rouens, three Ancona and two Welsh Harlequins.


Goodnight!

Sunday, May 1, 2011

Goat milk!

We have spoken about getting a goat for quite a while now.  At first after we got Butterbelle I thought I didn't want goats anymore.  Then my oldest DD turned out to be lactose intolerant.  A friend has goats and offered us one of her goats on a loan until December so we've taken her up on the offer.  Lilly is an Alpine, and she is an incredibly patient and good natured goat.  So we Dan set to work building a goat stanchion.  Have I mentioned how amazing my hubby is?

The beginning of the stanchion.

Almost done

I went to go have a chat with Lilly to tell her how the stanchion building was going

The head gate parts

It will eventually have a clasp to hold them together, for now a bungee will work

Complete!

Feed bucket installed, just the right size for a goat :)

Well... we had to test it out, right?  LOL!

The first milking, which actually went pretty easily!  Did I mention how patient Lilly is?

I love this photo!

Dan gave it a try as well.. he's probably going to need a bit more practice, LOL!

Now all we need is a milking stool :)
I'm quite pleased with how the stand worked, and how relatively easy the milking was.  Of course Lilly is a pro at it by now, and very patiently stood there and put up with our bumbling around.  We will be milking her mornings and evenings, and our friend says we could expect about a gallon a day from her.  We're going to be building another stand for our friend, she doesn't have one yet.

Butterbelle does not seem to like the goat very much... or maybe it's just food envy since we fed Lilly from the bucket we normally bring Butterbelle's grains in.. so for now Butterbelle is residing in pasture 2 with the pigs, while Lilly is in pasture 1 on her own.  They can all have a meet and greet through the gate and get to know each other.  Goats are so incredibly social and Lilly comes running each time someone is in view.  We love her!

We are still searching for our own dairy goat, still deliberating on what breed we want.  We're definitely leaning more toward Alpines, but we're considering Nubians too because they're a dual purpose breed and their milk apparently has the highest fat content of any goats.

Monday, April 25, 2011

Chicken Hoop House, Part Two

DH got the rest of the parts we needed for the hoop house today, so work could go on!  DH is a highly motivated man when there's a job to be done.


The completed door with hinges and a really neat locking mechanism.  It's a simple lock, but DH has a hook attached to a chain to close it with.  No need for a key, and no lost lock!


Close up of the lock, just because I think my hubby is a genius!

The back tarp goes up.  Now this is not secured towards the top, because you want to be able to turn the top section down for airflow on hotter days.  We don't want to roast those birds just yet!

Side view.

 Covered with the canvas tarp.  When they say a canvas tarp is 10 x 16, they don't REALLY mean it's 10 x 16.  It probably WAS 10 x 16 before they did the hemming.  Hm.  So now we'll need to get two smaller tarps for the bottom two sides to put under the canvas tarp.  Actually that works out better, because this way the chickens won't be able to peck at the canvas tarp.

Part of the chicken hoop house team.. photo taken by the missing team member ;)  We called it done for the night, it was starting to rain again and the smell of chicken stew was starting to waft outdoors.

Almost there, stay tuned for Part Three!

Sunday, April 24, 2011

Chicken Hoop House, Part One


Today we started work on the chicken hoop house for the meat birds who are starting to escape their garage quarters.. not to mention stinking the place up!  I wanted something movable, but chicken tractors weren't quite was I was looking for.  So I found a plan online for a chicken hoop house and gave it to my hubby and told him that was what I would like.  He took the plans, made some adjustments and away we went!

Materials list is as follows:

(2) 8' x 50" cattle panels
(4) 10' pressure treated 2 x 4s
(1) roll chicken wire (ours is 4' x 50', we can always use the extra!)
(2) 8' regular 2 x 4s
(1) package plumber's strapping
(1) 16 x 10 canvas tarp for over the top
(1) 8 x 10 silver tarp for the back
Misc. scraps of wood, or additional regular 2 x 4s
Staples, screws, nails, wire, zip ties, etc.

The hoop house will be covered with a tarp over the top and the back, leaving the front open.  For summer we will also leave a gap at the top of the back part for cross ventilation.  Each day the hoop will be moved to a new section of pasture in our vegetable field.  That keeps the grass and the chickens happy!

First DH and oldest DS notched out the pressure treated 2 x 4s, each one about a foot in from the edge.  They should NOT be flush when you are done.  Also cut the front and back of the side pieces at a 45 degree angle, these will be your skids, and you will attach rope or chain to them for moving the hoop house.  Many plans said to leave a bigger gap on the front and back piece, this is to make moving it easier and also so if you run over a chick when you're moving the house it can roll out the back.  We're more concerned with predators, so ours is lower down.  We'll just move it more slowly.

Our plans said to add brace pieces over the top of each corner, but if we followed the plans, the bracing would have been awful since the pieces are not flush.

 So instead DH notched out the front and back pieces to fit the brace piece.  Beautifully done!

 Bottom frame complete.

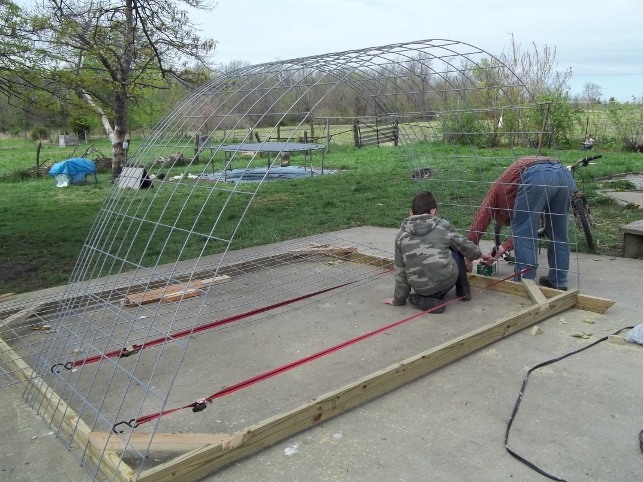
Now it's time to add one of the panels.  We first secured the panel with tie downs to keep their shape to make attaching easier.  We attached the hoops to the outside of the skids using fencing staples. 

 Second panel in place.

We secured the two panels to each other with some wire.  Notice the placement of the wire, this will prevent the wire from ripping at the tarp.

The back framing goes up.  This is done by making an upside down V and attaching that to the panel with plumber's strapping.  The 2 x 4 is also attached to the back of the bottom frame. Notice that we put the chicken wire on first before we added the back brace sections.  This makes it easier to pull the chicken wire taut.

 Framing for the door.  We made ours about 2' wide.  Again attached to the panel with plumber's strapping and screwed to the bottom of the frame.  After the door was on we added additional support between the door frame and the edge of the panel.

 Kids working on the chicken wire for the front section.  Our kids are an awesome help to us.

DH notching out the wood sections for the door.   I love those hands.

Almost complete!  We ran out of time and we don't yet have hinges or a lock.  Awesome work guys!  The chicks are going to love their new quarters :)  We retired for the night for a nice Resurrection Sunday dinner - roast lamb and potatoes, yum!
Related Posts Plugin for WordPress, Blogger...